Planking (not the lying down kind)
masts
rudder and the prow thing
You will need:
- the Patience of a monk
- the determination of a vengeful villain
- cardboard, from a couple of cereal boxes
- balsa wood, a couple of sheets
- an old wooden paintbrush
- a bigger paintbrush or a long bit of dowel or the stick you get with some balloons
- PVA/wood glue
- a craft knife
- unused toilet paper
- sharp scissors
- more of the thick card stuff or hard board.

some thing that always stands out one these ships is the prow and the rudder these can be made out of the same material used to make the deck higher. I use my thick card stuff but some simple hardboard or balsa will do.


Masts are about as important on sailing ships as engines are in tanks without them you can forget about moving anywhere fast.
First of all make some marks for where the masts will do it will be useful to use the lines you drew before on the foam as then you can have them set right in the centre. this is easy for the front mast but for the main one you will have to measure it out yourself. quite often its best that you find the location you are happy with.

For placing the mast at the front all you have to do is make a big enough hole in the foam. then put in an old wooden paintbrush. I used an old Tamiya paintbrush that deserved retirement. so now its the front/ fore mast of the ship
 for the jib boom/ that mast like thing that sticks out the front, use some dowel. I used one that I already had in my materials box I think its made of some hard wood. cut on end at an angle so that then it is placed the jib boom rests on the prow glue it in place... now for the foremast and the jib boom put some Balsa around the base of them.
Now because the main mast is the tallest I have no paintbrush big enough so I improvised and used the stick from a balloon you can get for parties and stuff. this I filled with some Balsa to give it some rigidity. then I recommend you drill a hole for it in the deck where you want to place it... glue in place and stick a cocktail stick in the top. this may look off now but it will all make sense later.


Step 3 sides
Now its time to add the sides. the material I use is quite flexible and can be bent around. for other materials you will have to find your own way of getting the right shape anyway start with the straight sides. the sides here are around 2 cm high with gun ports cut into them... for the curved bits follow this plan. the tallest side on the bow is 2 cm tall and the tallest side on the back is 3 cm with the curve going down until the height at the end matches lines up with the top of the main side.


Step 4 the prow
ignore the paper mache on the hull it was an experiment... add some strips of cardboard to the prow and bow in the manner shown. Next once you have allowed these to dry put some toilet parer over the top and form some paper mache! there prow done... for now


along the sides of my previous boats there was not planking and you do not have to do this... you can just add a cardboard cover for all the surfaces on the exterior of the vessel.
 but for the planks cut loads of strips of cardboard from the cereal boxes. start from the base and then work up the sides this is done line by line with each plan overlapping the level bellow. make sure that you cut lengths of cardboard that are of a reasonable length between 5-10 cm will do this is for the sides. glue them on slowly so that you can make sure it all goes together well this process is the longest and slowest of all and requires the patience of a monk and the determination of a vengeful villain!
at the ends simply cut smaller lengths of cardboard this is so that it goes around the corners better than long lengths also at the end it should look much better than if you used long lengths.

look at the images below... made bigger to get a good impression for the end result of the planking.


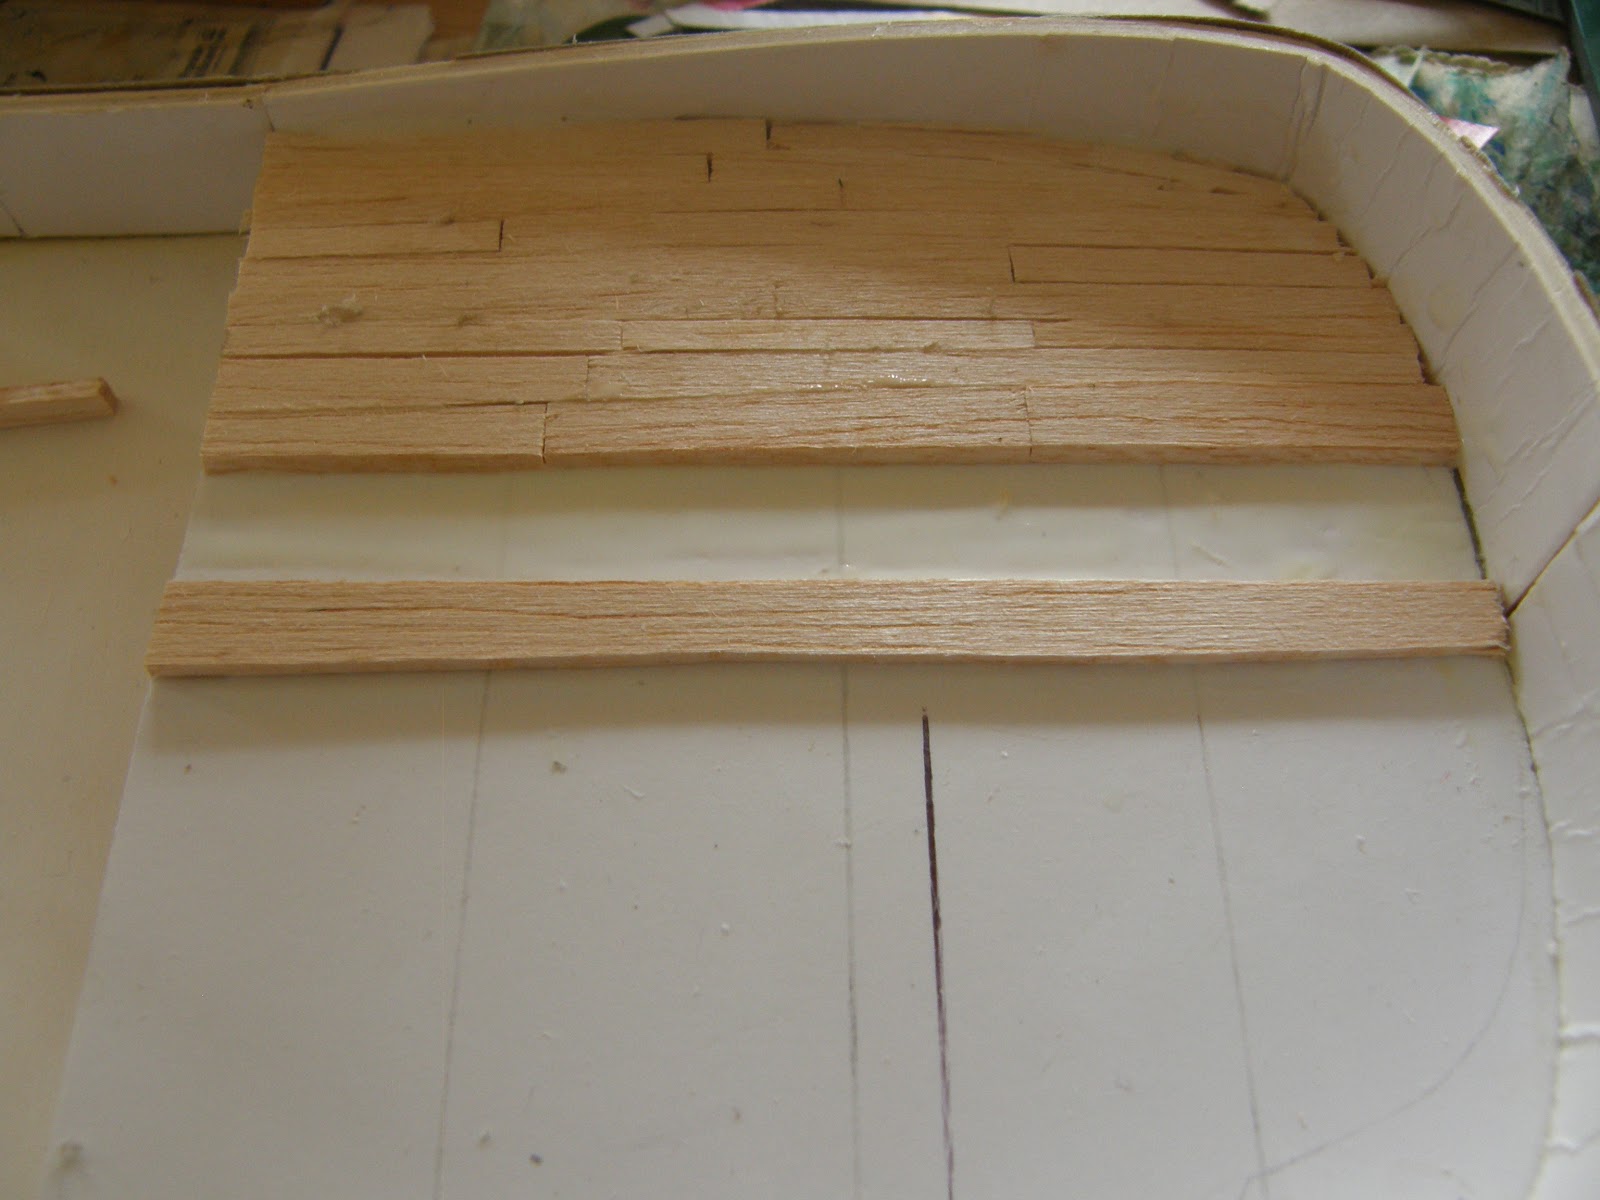
 Now for the decks of the Poop and the forecastle these are made from Balsa, cut into strips and then see how many strips you will need to fill up the width of the deck. but one end at an angle to allow the plank to sit roughly flush with the curved side of the bows and sterns. Then remove the excess length of the strips. keep hold of these as you can use these as well for the decking. now that you have the planks the right length and fit into the curves of the bow and stern simply cut them into smaller planks and glue them down!
Here is a top tip down the centre of the stern put a single plank this will not be obvious at the end but will help you place the wheel later and also the pole at the back.

 |
| this is what you should end up with |
And there you Have it step 2 is complete and that means most of the construction is done.... just the main deck needs planking which will be done after adding some details, sails are needed and other details.
Also hello to James form somewhere but there is no link? but hello all the same welcome to the blog.
Now for some bad news... I have run out of image space on the blog I bought some more but as I do not have work I may have to add adds to the bottom of the blog... until I can get a good job that is.
If you know of another free place to store images that would be good. Also the blog has been hit by a wave of spammers... I am thinking of a novel way to get back at them so stay tuned.
Nice continued WIP! The result is great, especially the decking. I'm not sure how the storage and all works, but does photobucket help? I've got an account there and I think you can put the images on blogger from there. Not sure though.
ReplyDeletethat was a fast comment Ben... are you able to predict the future??? anyway I am not sure if photobucket will help I have got the 100 gig plan and I hope that will work blogger has lasted for over a year with 5 gigs so then I should get 20 years of blogger with all that space :-D $5 US a month but not too bad especailly with adscenes when that is sorted out.
DeleteBusy, busy work Gowan. You may want to build real ones when you leave school!
ReplyDeleteI was doomed with point 1, try picassa for storing your pictures and copying them to your blog I believe.
ReplyDeleteHoly Cow Gowan, this is superb. I don't have the patience or the accuracy to be able to pull this off. Great tutorial series here.
ReplyDeleteI didn't know you could run out of image space on blogger. That's worrisome.
Great tutorial Gowan. I've had the same idea, but you've actually done it. I wonder if there is a way to turn off allowing anonymous posts? That anonymous guy is a real A-hole.
ReplyDeletevery very good Gowan!
ReplyDeleteyou're very imaginative and creative !
I like this "how-to-do-with-(almost)-nothing" tutorial !
thanks, my young friend!