I recently found out about this from Peter at Peter's cave and as its all for a good cause I decided I would spread the word! the charity auction is going on at Tales of a Tabletop Skirmisher Blog. go there to find out for, you can always spread the word yourselves or you can make a bid. remember the aim is not to win prises its to raise money for a good cause so even if you don't normally enter an auction like this, enter this one and help them raise money!
there we go guys lets hope that this little auction becomes a huge success! that's all from me for now, I am still working hard at my ship project and have already put up 3 out of 4 sails... getting very close to the painting stage :-D so all is well for now. I hope that we are all happy and healthy and to all my northern hemisphere friends if you are jealous of the sun here remember due to the depleted Ozone over here that sun burn is a HUGE problem... I am a little burnt myself.
Monday, 10 December 2012


Sunday, 9 December 2012
One Year of blogger!!!
well nearly... anyway what a year it has been I have gone from Romans and medieval to moderns and now the 18th century. but most of All I have made Oronegro perhaps the cornerstone of all my future modelling. I will celebrate one year of Oronegro later on so we'll get that then (the day I came back from Argentina.
so how to celebrate?
A dog walk with Oscar;
here is an odd presentation but I thought why not let them see a bit of Waiuku, other than the parts they can see on the Adds (if interested ask). so lets go on an Oscar walk to see some of the town in which I live.
Well happy one year of my blogging. in this year I have managed to paint many, many figures, perhaps 200-300 figs, I have managed to build 3 boats, 1 tank, 1APC which I turned into a howitzer, 1 BM-23-4, 1 truck, not to mention all those buildings for the city of Lay Ley in the 21st century, and even then I got those other places done, the tournament grounds, the little roman house, which is pretty generic, the little gate and wall that I included in my first post and I managed to use up my photo allowance (whoops). I cannot wait to see what the second year of blogger brings :-D (lets hope no spam and not using up the photo allowance)
so how to celebrate?
A dog walk with Oscar;
here is an odd presentation but I thought why not let them see a bit of Waiuku, other than the parts they can see on the Adds (if interested ask). so lets go on an Oscar walk to see some of the town in which I live.
 |
| Looking down racecourse RD where you can play golf ... yes confusing right |
 |
| is the grass greener over those hills? NO! because on the other side is a strip of black sand and then the Tasman sea (no you can't see Australia... thank goodness) |
 |
| The Waiuku river estuary unfortunately the tide was out :-( looks 100% nicer when its in |
 |
| Down by the pirate house... there is a little pond |
 |
| ah time for some pretty pictures I think |
 |
| behind me is the estuary BTW |
 |
| CAN YOU IMAGINE SOME HOBBITS IN CANOES COMING AROUND THE CORNER??? |
 |
| all I see is ducks |
 |
| I really should have gone out at high tide.... actually I did later but I forgot the camera... bugger |
 |
| Town beautification effort remove those mangroves.... those invasive pests need to be driven back so once more the Port of Waiuku can open up... on a much smaller scale than before |
 |
| the rolling hills around here... are ancient sand dunes, one area is full of black iron rich sand, which feeds the steel mill which supports this town... this sand gives us our black sand beaches |
 |
| I used to live on that side of town... sandspit Rd apparently the nicer part but not really well where we lived |
 |
| and not lets forget the star of the walk |
 |
| its hard on these hot summer days when your wearing a fur coat and can't sweat it out |
 |
| arty photo's sorry |
 |
| a peak at sandspit.... golden sand, onto mud. hmm not the nicest |
 |
| SORRY ABOUT THE TIDE |
 |
| more arty photo's |
 |
| 4 (four) |
 |
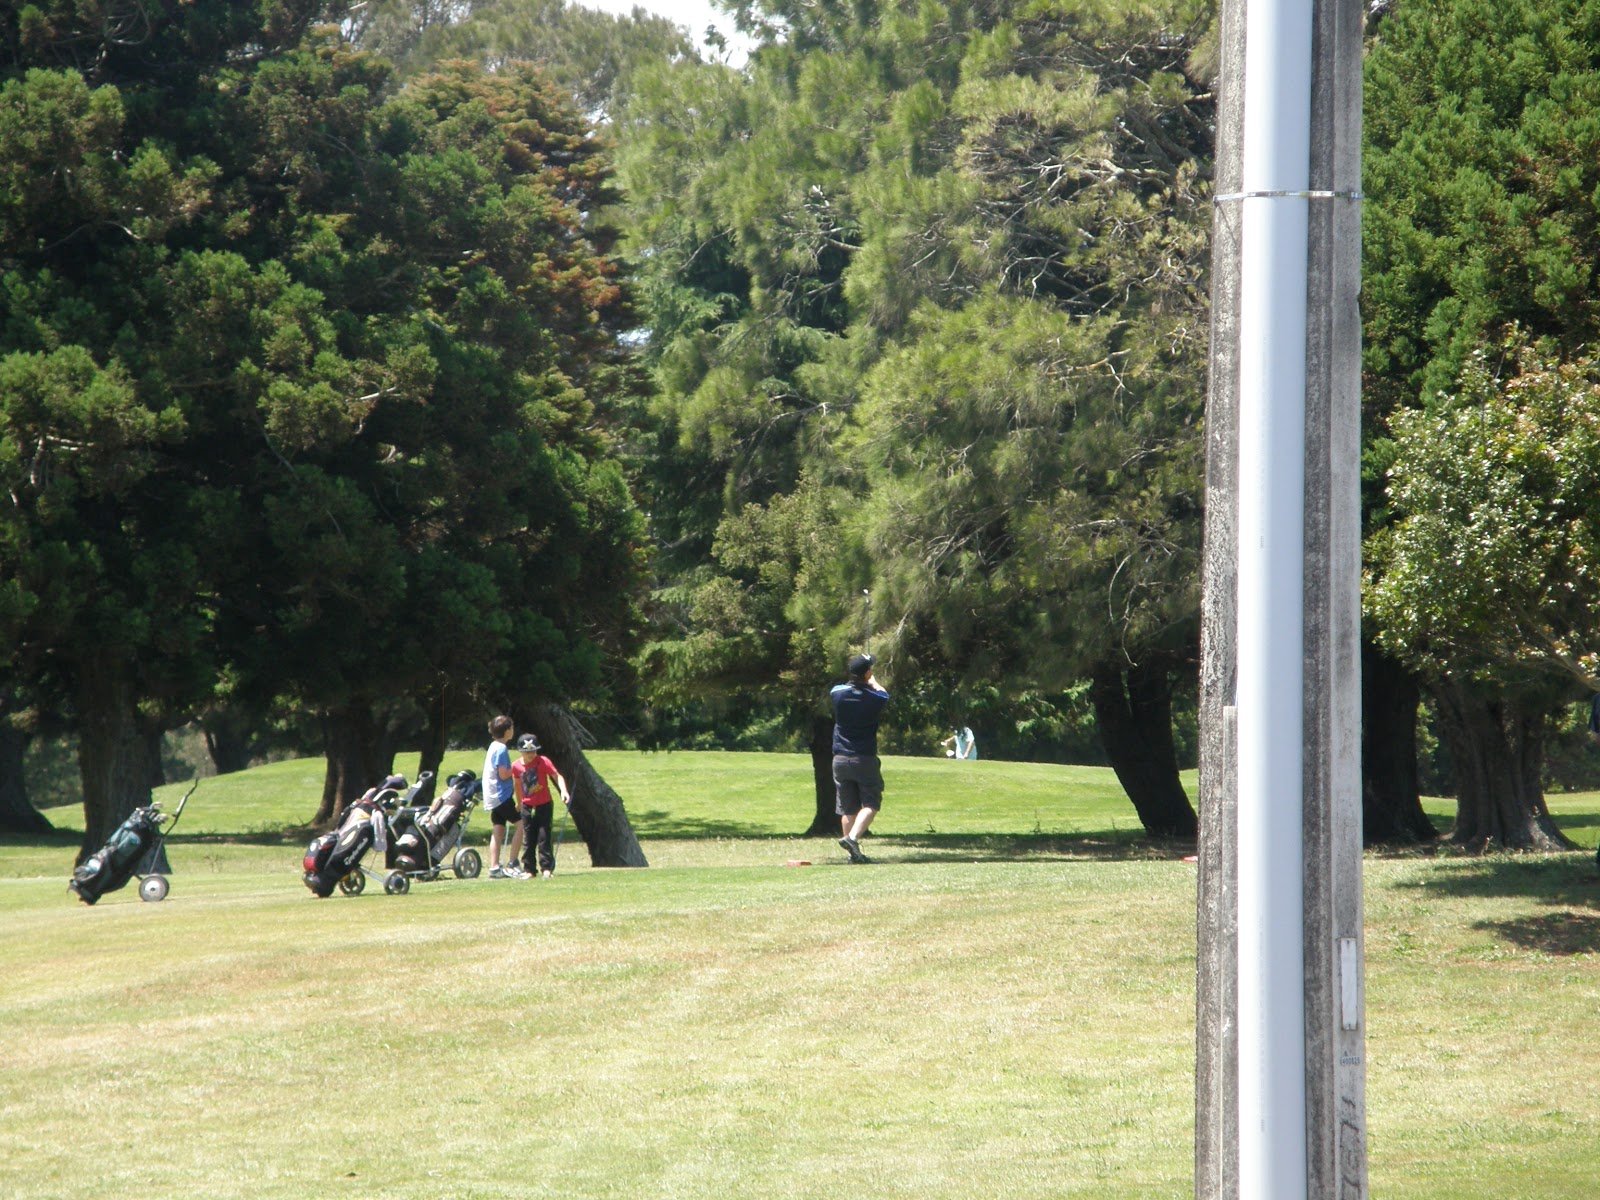
| the golf coarse that makes up most of racecourse road... no there is no racecourse |
 |
| Something for you warmth hungry northerners |
 |
| a Pōhutukawa or New Zealand Christmas tree pretty isn't it. |
 |
| and down the driveway we come to my house... come and visit if you are ever in New Zealand... or at least this end of the country.... (this is for my mum the walls are made from reclaimed brick from a monastery, it was built in the 1990's despite its appearances) |
 |
| the rabbits cages... 2 young girls right and ye olde bunny on the left |
 |
| hahaha some of you are wishing you were getting these temperatures.... oh its in degrees Celsius. |
Thursday, 6 December 2012
How to build a Wargaming Warship part 2
yes I know it has been a while since the last post but here is part 2 in which I will explain:
Planking (not the lying down kind)
masts
rudder and the prow thing
You will need:
 Step one other structures:
some thing that always stands out one these ships is the prow and the rudder these can be made out of the same material used to make the deck higher. I use my thick card stuff but some simple hardboard or balsa will do.

 Step 2 masts
Masts are about as important on sailing ships as engines are in tanks without them you can forget about moving anywhere fast.
First of all make some marks for where the masts will do it will be useful to use the lines you drew before on the foam as then you can have them set right in the centre. this is easy for the front mast but for the main one you will have to measure it out yourself. quite often its best that you find the location you are happy with.

For placing the mast at the front all you have to do is make a big enough hole in the foam. then put in an old wooden paintbrush. I used an old Tamiya paintbrush that deserved retirement. so now its the front/ fore mast of the ship
 for the jib boom/ that mast like thing that sticks out the front, use some dowel. I used one that I already had in my materials box I think its made of some hard wood. cut on end at an angle so that then it is placed the jib boom rests on the prow glue it in place... now for the foremast and the jib boom put some Balsa around the base of them.
Now because the main mast is the tallest I have no paintbrush big enough so I improvised and used the stick from a balloon you can get for parties and stuff. this I filled with some Balsa to give it some rigidity. then I recommend you drill a hole for it in the deck where you want to place it... glue in place and stick a cocktail stick in the top. this may look off now but it will all make sense later.


Step 3 sides
Now its time to add the sides. the material I use is quite flexible and can be bent around. for other materials you will have to find your own way of getting the right shape anyway start with the straight sides. the sides here are around 2 cm high with gun ports cut into them... for the curved bits follow this plan. the tallest side on the bow is 2 cm tall and the tallest side on the back is 3 cm with the curve going down until the height at the end matches lines up with the top of the main side.


Step 4 the prow
ignore the paper mache on the hull it was an experiment... add some strips of cardboard to the prow and bow in the manner shown. Next once you have allowed these to dry put some toilet parer over the top and form some paper mache! there prow done... for now

 Step 5 Planking along the sides
along the sides of my previous boats there was not planking and you do not have to do this... you can just add a cardboard cover for all the surfaces on the exterior of the vessel.
 but for the planks cut loads of strips of cardboard from the cereal boxes. start from the base and then work up the sides this is done line by line with each plan overlapping the level bellow. make sure that you cut lengths of cardboard that are of a reasonable length between 5-10 cm will do this is for the sides. glue them on slowly so that you can make sure it all goes together well this process is the longest and slowest of all and requires the patience of a monk and the determination of a vengeful villain!
at the ends simply cut smaller lengths of cardboard this is so that it goes around the corners better than long lengths also at the end it should look much better than if you used long lengths.

look at the images below... made bigger to get a good impression for the end result of the planking.


 Step 6 the first decking
 Now for the decks of the Poop and the forecastle these are made from Balsa, cut into strips and then see how many strips you will need to fill up the width of the deck. but one end at an angle to allow the plank to sit roughly flush with the curved side of the bows and sterns. Then remove the excess length of the strips. keep hold of these as you can use these as well for the decking. now that you have the planks the right length and fit into the curves of the bow and stern simply cut them into smaller planks and glue them down!
Here is a top tip down the centre of the stern put a single plank this will not be obvious at the end but will help you place the wheel later and also the pole at the back.


And there you Have it step 2 is complete and that means most of the construction is done.... just the main deck needs planking which will be done after adding some details, sails are needed and other details.
Also hello to James form somewhere but there is no link? but hello all the same welcome to the blog.
Now for some bad news... I have run out of image space on the blog I bought some more but as I do not have work I may have to add adds to the bottom of the blog... until I can get a good job that is.
If you know of another free place to store images that would be good. Also the blog has been hit by a wave of spammers... I am thinking of a novel way to get back at them so stay tuned.
Planking (not the lying down kind)
masts
rudder and the prow thing
You will need:
- the Patience of a monk
- the determination of a vengeful villain
- cardboard, from a couple of cereal boxes
- balsa wood, a couple of sheets
- an old wooden paintbrush
- a bigger paintbrush or a long bit of dowel or the stick you get with some balloons
- PVA/wood glue
- a craft knife
- unused toilet paper
- sharp scissors
- more of the thick card stuff or hard board.

some thing that always stands out one these ships is the prow and the rudder these can be made out of the same material used to make the deck higher. I use my thick card stuff but some simple hardboard or balsa will do.


Masts are about as important on sailing ships as engines are in tanks without them you can forget about moving anywhere fast.
First of all make some marks for where the masts will do it will be useful to use the lines you drew before on the foam as then you can have them set right in the centre. this is easy for the front mast but for the main one you will have to measure it out yourself. quite often its best that you find the location you are happy with.

For placing the mast at the front all you have to do is make a big enough hole in the foam. then put in an old wooden paintbrush. I used an old Tamiya paintbrush that deserved retirement. so now its the front/ fore mast of the ship
 for the jib boom/ that mast like thing that sticks out the front, use some dowel. I used one that I already had in my materials box I think its made of some hard wood. cut on end at an angle so that then it is placed the jib boom rests on the prow glue it in place... now for the foremast and the jib boom put some Balsa around the base of them.
Now because the main mast is the tallest I have no paintbrush big enough so I improvised and used the stick from a balloon you can get for parties and stuff. this I filled with some Balsa to give it some rigidity. then I recommend you drill a hole for it in the deck where you want to place it... glue in place and stick a cocktail stick in the top. this may look off now but it will all make sense later.


Step 3 sides
Now its time to add the sides. the material I use is quite flexible and can be bent around. for other materials you will have to find your own way of getting the right shape anyway start with the straight sides. the sides here are around 2 cm high with gun ports cut into them... for the curved bits follow this plan. the tallest side on the bow is 2 cm tall and the tallest side on the back is 3 cm with the curve going down until the height at the end matches lines up with the top of the main side.


Step 4 the prow
ignore the paper mache on the hull it was an experiment... add some strips of cardboard to the prow and bow in the manner shown. Next once you have allowed these to dry put some toilet parer over the top and form some paper mache! there prow done... for now


along the sides of my previous boats there was not planking and you do not have to do this... you can just add a cardboard cover for all the surfaces on the exterior of the vessel.
 but for the planks cut loads of strips of cardboard from the cereal boxes. start from the base and then work up the sides this is done line by line with each plan overlapping the level bellow. make sure that you cut lengths of cardboard that are of a reasonable length between 5-10 cm will do this is for the sides. glue them on slowly so that you can make sure it all goes together well this process is the longest and slowest of all and requires the patience of a monk and the determination of a vengeful villain!
at the ends simply cut smaller lengths of cardboard this is so that it goes around the corners better than long lengths also at the end it should look much better than if you used long lengths.

look at the images below... made bigger to get a good impression for the end result of the planking.


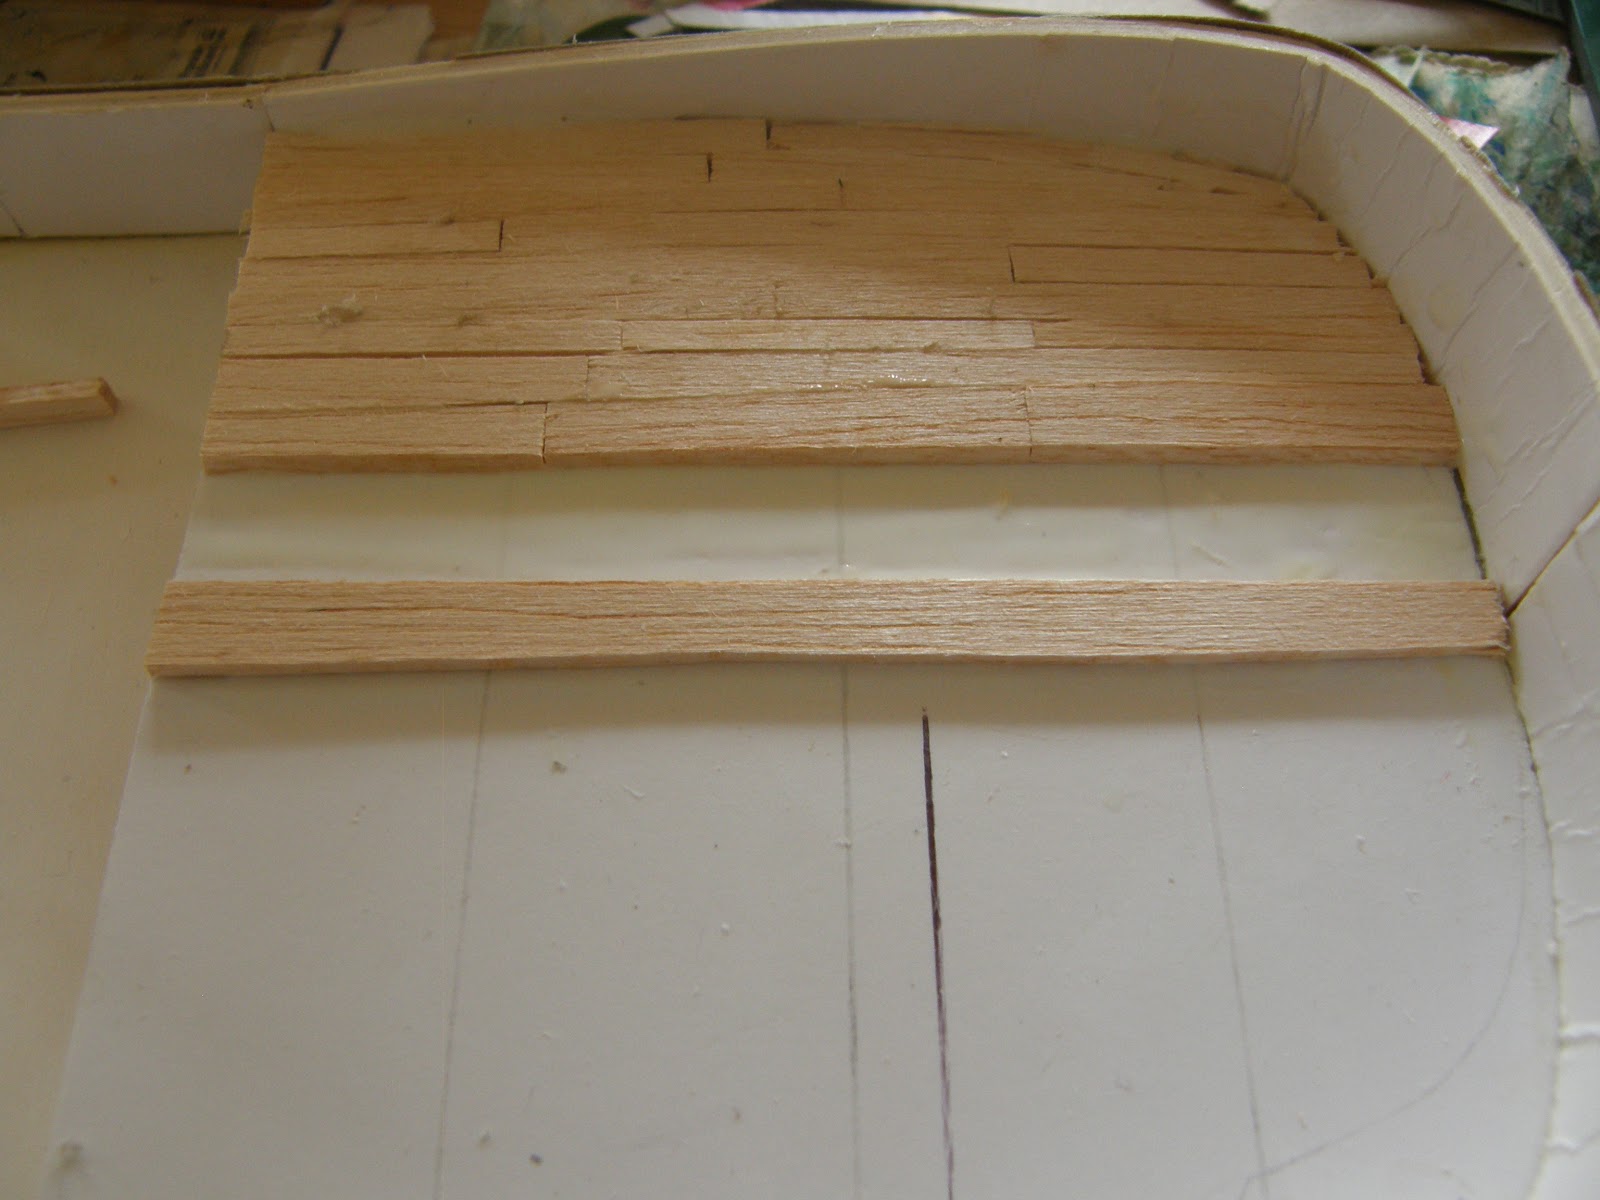
 Now for the decks of the Poop and the forecastle these are made from Balsa, cut into strips and then see how many strips you will need to fill up the width of the deck. but one end at an angle to allow the plank to sit roughly flush with the curved side of the bows and sterns. Then remove the excess length of the strips. keep hold of these as you can use these as well for the decking. now that you have the planks the right length and fit into the curves of the bow and stern simply cut them into smaller planks and glue them down!
Here is a top tip down the centre of the stern put a single plank this will not be obvious at the end but will help you place the wheel later and also the pole at the back.

 |
| this is what you should end up with |
And there you Have it step 2 is complete and that means most of the construction is done.... just the main deck needs planking which will be done after adding some details, sails are needed and other details.
Also hello to James form somewhere but there is no link? but hello all the same welcome to the blog.
Now for some bad news... I have run out of image space on the blog I bought some more but as I do not have work I may have to add adds to the bottom of the blog... until I can get a good job that is.
If you know of another free place to store images that would be good. Also the blog has been hit by a wave of spammers... I am thinking of a novel way to get back at them so stay tuned.
Thursday, 29 November 2012
How to Build a Wargaming Warship Part 1
or more specifically a Cruizer class Brig Sloop. Well after trawling the Internet for suitable small Warships to represent some Pirates and a first rate Boat of the line I looked down at my Napoleon Total War and found this little statement...
"ship plans courtesy of the National Maritime Museum, London."
Now so far all the searches I had done for ship plans had taken me to model ship builder forums, Which are really useful... if your not making wargaming ships I needed a large selection of old drawings, sure plenty out there but not a nice selection in just one place... until I went to the Museums Internet site and then with a bit of knowledge gifted by Uncle Wiki I was set to build... and now you can too! P.S I am still building this ship and Paul so please hang tight as this is only the first part...
Preparation: get some plans...
To do this you can search the Internet for all the kings of images you want but simply typing into Google "sloop ship plans" is not really going to help to much and typing "Cruizer ship plans" will normally only give you pictures of the Beagle. (HMS Beagle). So if you know what you want go http://www.rmg.co.uk/ for the National Maritime Museum in Greenwich... ignore the fact it tells you the page does not exist... then go to collections and start looking :-)
Also try Wikipedia for some basic ship Dimensions convert to the correct scale and then Round them UP to the nearest cm or if you use imperial... umm... not quite sure half inch? perhaps. Rounding up is better as ships in scale look smaller for some reason.
Now that you have your plans get some materials.... You will need! (for this stage)
 it is important that you get the overall length of the ship and the width so that you can make a rectangle. Draw this rectangle onto your foam and then score the foam before cutting.
Do this process twice.
Now that you have your rectangles you need to cut them out. do this carefully as you will need to do more measurements later on. I recommend that you only cut one out for now.


Step 2: Getting the curves
Now ships are not giant rectangles so we need to put in the curves for the bow and stern to do this make a grid pattern on the face of the foam. I put "vertical" lines every 3 cm.
Now you must look back at the plans to see what the curve on the actual ship is like. Now go to your foam sketch an proximate curve onto it. in the image across I have drawn the sterns lines and also some lines to represent what the underside will look like.remember do to make these smaller than the plans so bow is thinner and sharper and stern is less rounded.
Now do some cutting this must be done slowly and precisely to minimise the risk of ending up with an odd looking ship later on.
Now do the same on the underside. for this go about 1 cm in from the edge at the side and around 2-3 on the bow and stern... referring to the plans help determine the angles.
now comes the blade destroying part. cut diagonally through the foam from the bottom to the top creating the angles. it helps to cut the lines on the bottom first to reduce the risk of snapping your craft knifes blade!


Step 3: the layers - poop deck and forecastle
Now that you've done the base of the sloop you need to do the top. re-do steps one and 2 but this time follow the plans more exactly so that the curves on the ship are more like those on the plans.
make sure that the bottom of this layer matches up with the top of the previous one so that they fit together. or else you will be in trouble.
 Now cut out the centre of the second foam layer so that you have the ends. These are the forecastle and poop deck. glue these in place. unlike me I recommend that if you have a clamp to use it.
Step 4: the gun deck/ centre of the ship
get your other material, I use some really thick card. its really strong which might be useful later but even some foam core or hardboard will do.
 measure up the gap between the forecastle and poop deck. Once again cut out a rectangle to fit in the gap. if there are some curves that need to be taken into account simply trim the rectangle to fit without overhanging the edges.
 Then glue down the card, foam or whatever you are using if like me this layer is not thick enough add another until the gap between the layers seems more like that of the plans... so in this case not to big.
End of Part one
now step one is complete you should have the backbone of a ship onto which you can put your cardboard skin and planking. More importantly you will need to put the masts on.
Thats all in part 2 though so you need to wait. also I have not even got that far yet.
Now just a look at HMS Paul... progress has been slow because I have been focusing on building the larger ship so Paul will take a while but here is what she looks like so far... She, why are ships she? even when they have masculine names?
Well now all I need to do now is work on the ship so that I can make part2. This ship will be Abigail the Pirate ship that terrorised the Atlantic coast of North and South America and cursed that Caribbean. destroying cities as she went... oh wait that's my sister... its appropriate :-D now my sister does not feel left out. now just need a few more to complete the fleets.
"ship plans courtesy of the National Maritime Museum, London."
Now so far all the searches I had done for ship plans had taken me to model ship builder forums, Which are really useful... if your not making wargaming ships I needed a large selection of old drawings, sure plenty out there but not a nice selection in just one place... until I went to the Museums Internet site and then with a bit of knowledge gifted by Uncle Wiki I was set to build... and now you can too! P.S I am still building this ship and Paul so please hang tight as this is only the first part...
Preparation: get some plans...
 |
| go online and look for some plans some are free but the best are not |
Also try Wikipedia for some basic ship Dimensions convert to the correct scale and then Round them UP to the nearest cm or if you use imperial... umm... not quite sure half inch? perhaps. Rounding up is better as ships in scale look smaller for some reason.
 |
| some information from Uncle Wiki... I should have looked at the crew size and gone oh it is huge |
 |
| This is some "Lines" of a Cruizer class brig sloop |
Now that you have your plans get some materials.... You will need! (for this stage)
- some french curves (well more useful than necessary)
- a pencil
- Foam board, polystyrene or other foam material
- Craft knife
- some thick card, foam-core or some hardboard or a material thinner than the foam
- A ruler
- cutting board
- PVA glue
- patience and lots of it :-(

Do this process twice.
Now that you have your rectangles you need to cut them out. do this carefully as you will need to do more measurements later on. I recommend that you only cut one out for now.


Step 2: Getting the curves
Now ships are not giant rectangles so we need to put in the curves for the bow and stern to do this make a grid pattern on the face of the foam. I put "vertical" lines every 3 cm.
Now you must look back at the plans to see what the curve on the actual ship is like. Now go to your foam sketch an proximate curve onto it. in the image across I have drawn the sterns lines and also some lines to represent what the underside will look like.remember do to make these smaller than the plans so bow is thinner and sharper and stern is less rounded.
Now do some cutting this must be done slowly and precisely to minimise the risk of ending up with an odd looking ship later on.
Now do the same on the underside. for this go about 1 cm in from the edge at the side and around 2-3 on the bow and stern... referring to the plans help determine the angles.
now comes the blade destroying part. cut diagonally through the foam from the bottom to the top creating the angles. it helps to cut the lines on the bottom first to reduce the risk of snapping your craft knifes blade!


Step 3: the layers - poop deck and forecastle
Now that you've done the base of the sloop you need to do the top. re-do steps one and 2 but this time follow the plans more exactly so that the curves on the ship are more like those on the plans.
make sure that the bottom of this layer matches up with the top of the previous one so that they fit together. or else you will be in trouble.
 Now cut out the centre of the second foam layer so that you have the ends. These are the forecastle and poop deck. glue these in place. unlike me I recommend that if you have a clamp to use it.
Step 4: the gun deck/ centre of the ship
get your other material, I use some really thick card. its really strong which might be useful later but even some foam core or hardboard will do.
 measure up the gap between the forecastle and poop deck. Once again cut out a rectangle to fit in the gap. if there are some curves that need to be taken into account simply trim the rectangle to fit without overhanging the edges.
 Then glue down the card, foam or whatever you are using if like me this layer is not thick enough add another until the gap between the layers seems more like that of the plans... so in this case not to big.
End of Part one
now step one is complete you should have the backbone of a ship onto which you can put your cardboard skin and planking. More importantly you will need to put the masts on.
Thats all in part 2 though so you need to wait. also I have not even got that far yet.
Now just a look at HMS Paul... progress has been slow because I have been focusing on building the larger ship so Paul will take a while but here is what she looks like so far... She, why are ships she? even when they have masculine names?
 |
| the sides are added and just need trimming |
 |
| nice and smooth... as you can see this ship is also made from cracker boxes |
 |
| I think this fig is fed up with being used for all the naval posts :-P |
Subscribe to:
Posts (Atom)